WIFI connection test
| Please do not connect to WIFI by modifying the /etc/network/interfaces configuration file. There will be problems connecting to the WIFI network in this way. |
1. The server image connects to WIFI through commands
| When the development board is not connected to Ethernet, not connected to HDMI display, but only connected to the serial port, it is recommended to use the commands demonstrated in this section to connect to the WIFI network. Because nmtui can only display characters in some serial port software (such as minicom), and cannot display the graphical interface normally. Of course, if the development board is connected to an Ethernet or HDMI display, you can also use the commands demonstrated in this section to connect to the WIFI network. |
1) First log in to the linux system, there are the following three ways
a. If the development board is connected with a network cable, you can remotely log in to the Linux system through ssh
b. If the development board is connected to the debugging serial port, you can use the serial port terminal to log in to the Linux system
c. If the development board is connected to the HDMI display, you can log in to the linux system through the terminal displayed on the HDMI
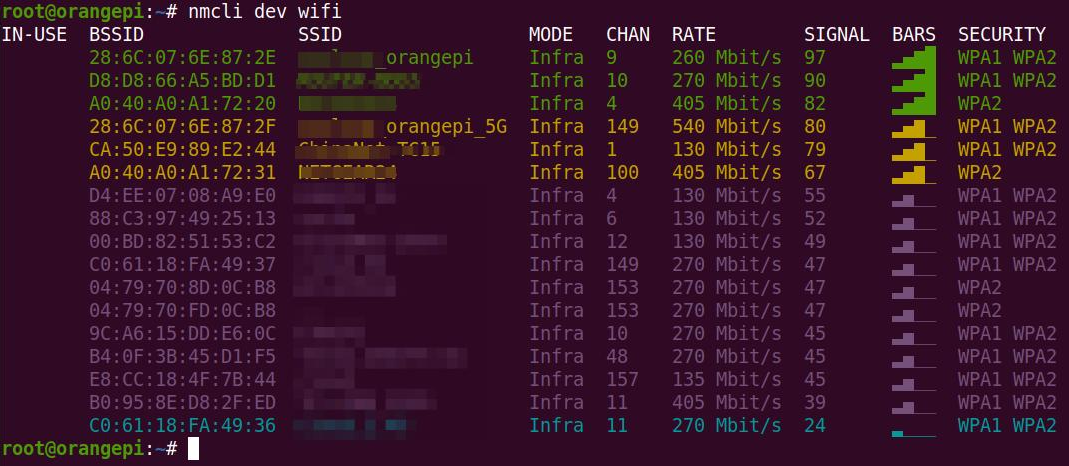
2) First use the nmcli dev wifi command to scan the surrounding WIFI hotspots
| orangepi@orangepi:~$ nmcli dev wifi |
3) Then use the nmcli command to connect to the scanned WIFI hotspot, where:
a. wifi_name needs to be replaced with the name of the WIFI hotspot you want to connect to
b. wifi_passwd needs to be replaced with the password of the WIFI hotspot you want to connect to
| orangepi@orangepi:~$ nmcli dev wifi connect wifi_name password wifi_passwd
Device 'wlan0' successfully activated with 'cf937f88-ca1e-4411-bb50-61f402eef293'. |
4) You can view the IP address of wifi through the ip addr show wlan0 command
| orangepi@orangepi:~$ ip addr show wlan0 11: wlan0: <BROADCAST,MULTICAST,UP,LOWER_UP> mtu 1500 qdisc pfifo_fast state UP group default qlen 1000
|
5) Use the ping command to test the connectivity of the wifi network, and the ping command can be interrupted through the shortcut key Ctrl+C
| orangepi@orangepi:~$ ping www.orangepi.online -I wlan0 PING www.orangepi.online (182.92.236.130) from 192.168.1.49 wlan0: 56(84) bytes of data. |
2. The server image connects to WIFI in a graphical way
1) First log in to the linux system, there are the following three ways
a. If the development board is connected with a network cable, you can remotely log in to the Linux system through ssh
b. If the development board is connected to the debugging serial port, you can use the serial port terminal to log in to the linux system (please use MobaXterm for the serial port software, and minicom cannot display the graphical interface)
c. If the development board is connected to the HDMI display, you can log in to the linux system through the terminal displayed on the HDMI
2) Then enter the nmtui command in the command line to open the wifi connection interface
| orangepi@orangepi:~$ nmtui |
3) Enter the nmtui command to open the interface as shown below

4) Select Activate a connect and press Enter
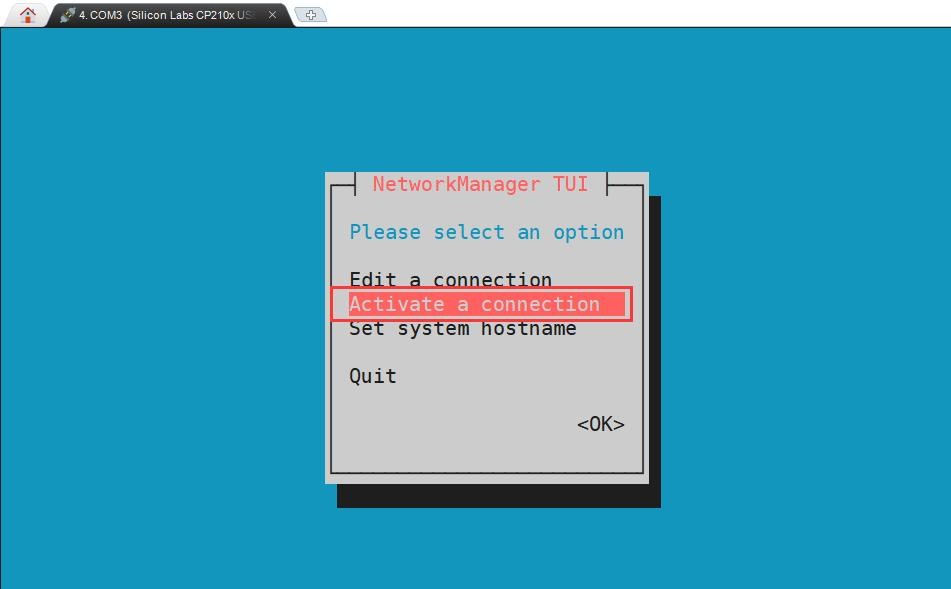
5) Then you can see all the searched WIFI hotspots

6) Select the WIFI hotspot you want to connect to, then use the Tab key to position the cursor on Activate and press Enter
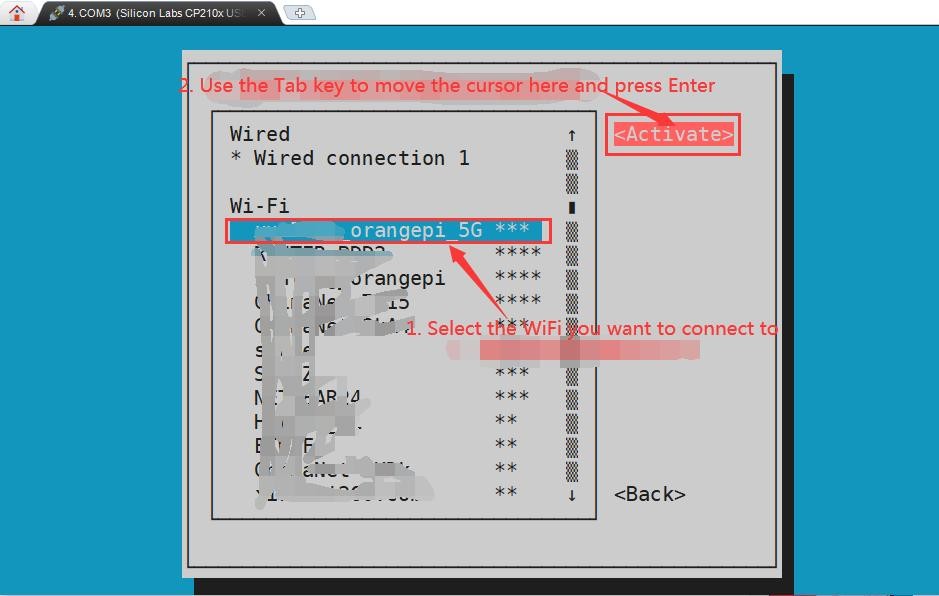
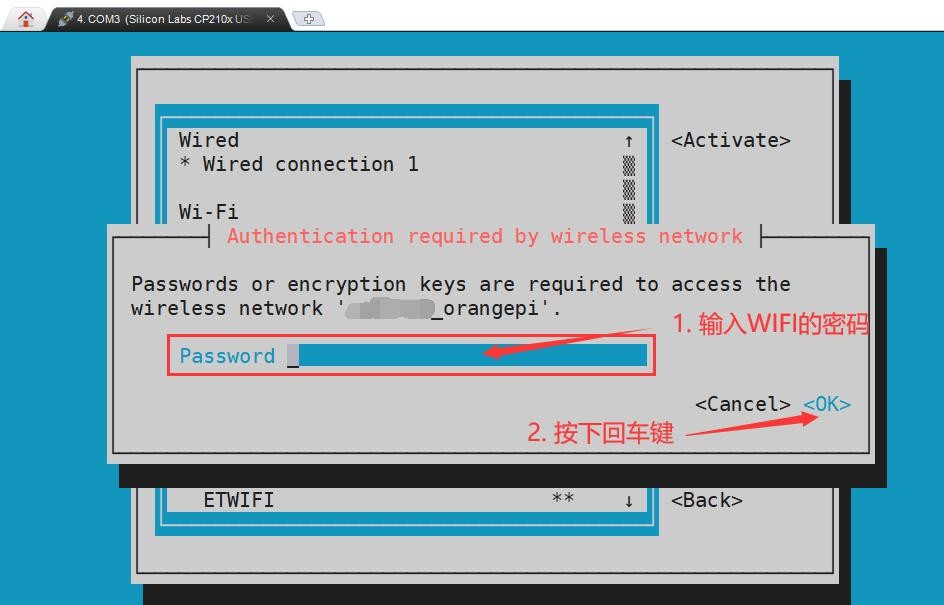
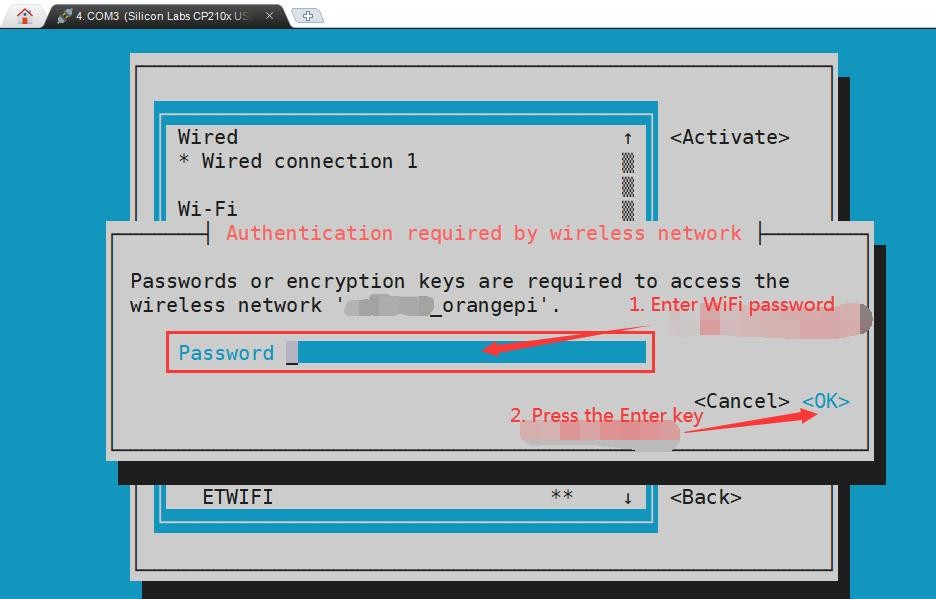
7) Then a dialog box for entering a password will pop up, enter the corresponding password in Password and press Enter to start connecting to WIFI
8) After the WIFI connection is successful, a "*" will be displayed in front of the connected WIFI name
9) You can view the IP address of wifi through the ip addr show wlan0 command
| orangepi@orangepi:~$ ip addr show wlan0 11: wlan0: <BROADCAST,MULTICAST,UP,LOWER_UP> mtu 1500 qdisc pfifo_fast state UP group default qlen 1000
|
10) Use the ping command to test the connectivity of the wifi network, and the ping command can be interrupted through the shortcut key Ctrl+C
| orangepi@orangepi:~$ ping www.orangepi.online -I wlan0 PING www.orangepi.online (182.92.236.130) from 192.168.1.49 wlan0: 56(84) bytes of data. |
3. Test method of desktop image
1) Click the network configuration icon in the upper right corner of the desktop (please do not connect the network cable when testing WIFI)
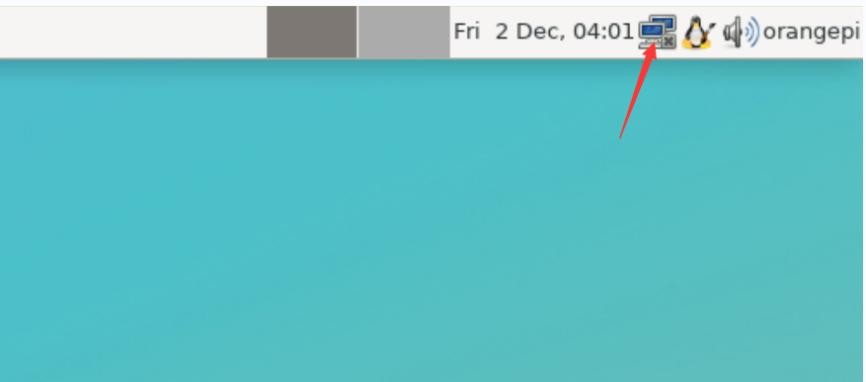
2) Click More networks in the pop-up drop-down box to see all scanned WIFI hotspots, and then select the WIFI hotspot you want to connect to

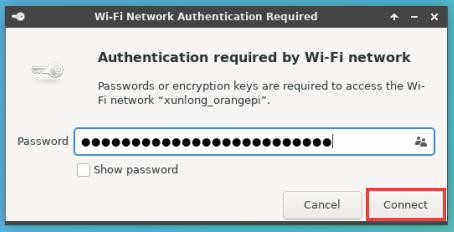
3) Then enter the password of the WIFI hotspot, and then click Connect to start connecting to WIFI
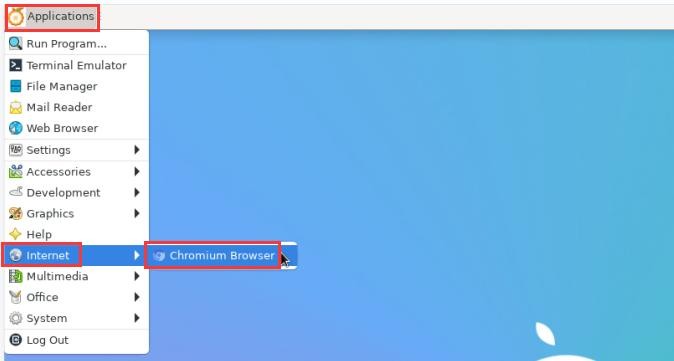
4) After connecting to WIFI, you can open the browser to check whether you can access the Internet. The entrance of the browser is shown in the figure below
5) If you can open other web pages after opening the browser, it means that the WIFI connection is normal
